| Class Description | Instructor Provides | Participant Brings | Participant Takes Home | Min Size | Max Size | Class Length | Class Fee | Instructor |
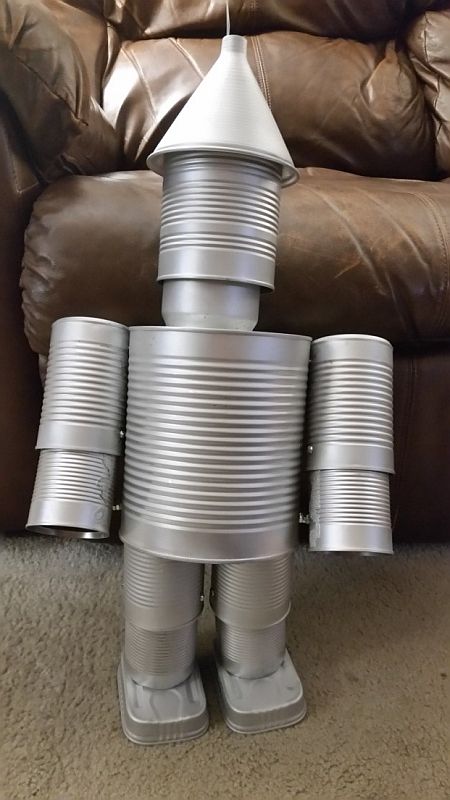
| Transform your cans into the Tin Man of your dreams. | 4 Cordless drills/bits, 5 spring loaded center punches,
various 2 x 2 pieces of wood to support cans while drilling. Assembly kit for each participant containing machine metal screws & nuts #8-32, an eye bolt & nut, wire, a 7" threaded rod, a few washers and a handmade aluminum nose. Red, black & white acrylic paint and brushes to decorate completed tin man, and instructions. |
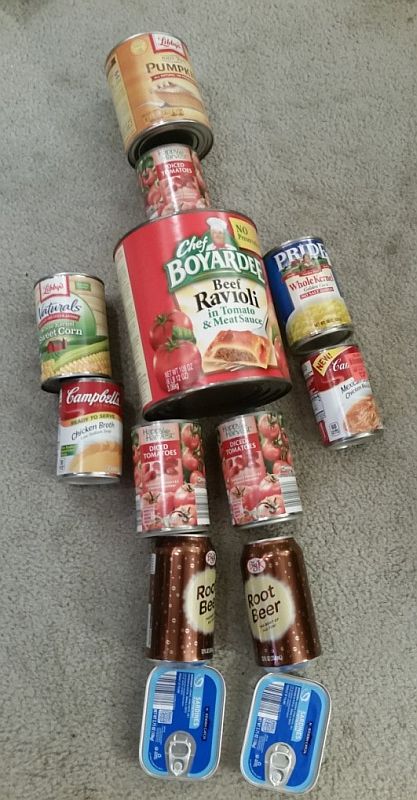
5 - 15 oz veggie cans, 1 - 28 oz can, 1 - #10 can, 4 - 10.5 oz soup cans, 2 - sardine cans, and a funnel.* *Two of the veggie cans should have both ends removed. Retain removed lids for decorating purposes. All cans, lids and funnel should be drained, washed and spray painted (I did 2 coats) before bringing them to camp and/or class. I found my metal funnels at Ace Hardware. Tools needed for ease and time: your own drill/bit and center punch or awl & hammer, scissors, a magnetic end item (I used my 6 in 1 screwdriver). Optional - a wrench to turn nuts inside cans, and items to decorate as wanted such as wiggly eyes, can lids for ears/hands/nose/heart, metal bottle caps for eyes, nose, "buttons" on body, heart, chain for hanging heart. Can use paint, stickers or other 3-D items. Gloves to protect hands from can edges (I couldn't fit hand in can or feel nuts with gloves on) |
Tin Man | 6 | 12 | 3 hrs | $3 | Melonie Luxbacher |
From this ... |
To this ... |
|
 |
 |